Hope you are all having a great week, mine has disappeared so quickly but I have been enjoying myself. Thursday is my day for joining friends for a sit and sew session so last week it was time to make more hearts for Luv Shack and there was room to layout my top and place them ready for stitching.
Pleased I took this photo before starting to stitch as can see one heart that needs to move a little.
My intention was that the hearts would be randomly placed and hopefully when finished and all the little hearts are added it will look random but my brain won't let me work like that, I need them to be precise and balanced so it will be interesting to see what it looks like in the end.
Planned to have a week of stitching the hearts and getting lots further before Esther releases part 3 of Secret Garden on Saturday but some one said the best laid plans of Mice and Men or something like that go astray and they did for me when Esther gave us Easter Blessings on Friday. have all the Easter patterns that Esther has designed over the years but have only made one other, it was also called Easter Blessings and was 2013 project.
Pattern was for a mini quilt and I didn't increase the pattern at all ( was meant to be increased by 200%) so my finished quilt is 9 1/2 inches square and was so much fun to make.
Maybe that is why I couldn't resist another easter project with the same name or maybe it was the delightful Bunny in this years pattern.
Knew I still had some of the velvet type fabric I had used for the bunny last time, found it on Sunday and was underway.
Put together on baking paper over my pattern
The fabric is shaded so was able to fussy cut my pieces and used a piece of silk kimono fabric that is also textured for his legs and face. the ridge that shows I trimmed away after stitching.
Initial stitching on heavy tearaway.
As I was going to pad him/her I did the internal stitching with my bunny on heavy tearaway using a bronze metallic thread. Eye is reverse applique adding the eyelid afterstitching the eye itself, also stitched the right whiskers at this stage.
Padding cut and placed.
Decided not to pad both front legs so the one without padding will appear to be further back when stitched.
Padded and ready for placement.
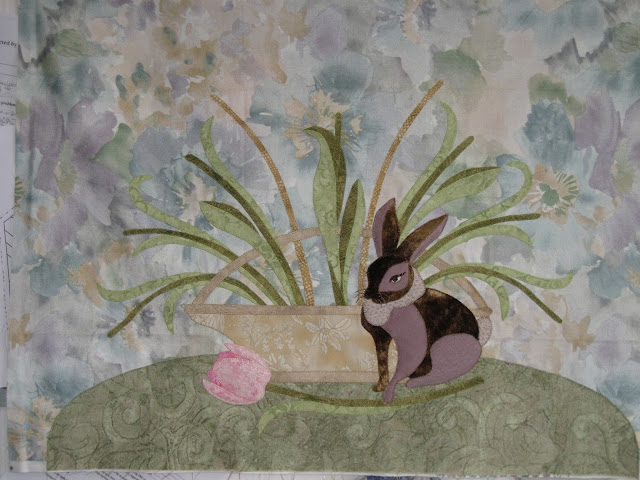
At guild in Auckland last month there was a collection of furnishing samples being given away and I got some in muted pastels one of which kept tempting me to use it as my background. Was going to be a challenge but decided to go ahead.
Looked like random colours till it was hanging and the flowers became obvious
A soft green Jinny Beyer fabric for my tablecloth and this time I only fused the edges so I can cut away the background fabric. Love the fabric but not sure that I haven't made things more difficult.
Bunny looks lovely but is my vase too light.
Where I am at this morning.
Seems to be coming together and with there being no pinks or yellows in my background am hoping using those shades for my flowers will make it all work.
Am heading back to sewing room to carry on. would love to know what you think.
Cheers Everyone, Jenny


Jenny its fantastic, see how the back ground is fading in to the back ground as you have added these other elements to it. My this is going to be Fab Jenny thanks again for such a detailed tutorial on how you are making it, I do appreciate the time you take to share your skills as an artist. Hugs Glenda PS I do Love the heart quilt too.
ReplyDeleteIt looks stunning, love the water colour background fabric.
ReplyDeleteLove your bunny, its all coming together so nicely.
ReplyDelete