Hi Everyone,
Haven't blogged or done any sewing for a couple of weeks as have had a stressful time at work.
The company I worked has been restructuring and rerostering in all their stores for some months and it was our turn. Outcome - my position was disestablished and although I could apply for the new position there were no guarantees I would get it. After some hard thinking and talking with my DH I decided it was best to take the companies redunancy offer and after 8 1/2 years loving my work, move on. SO this year no long hours leading up to Christmas and I am able to have quality time with my DH while I work out what next for me, Mon 30th Nov became my last day.
Dec 1st, out came Esther's wonderful 12 days of Christmas. Steve bought me the pattern for Christmas last year and I have waited for 11 months to hang her in pride of place in our lounge.
There will be another photo when I have finished decorating the buffet as I am going shopping for new decorations to make this our Christmas feature.
I increased the size to fit the same quilt hanger as Faberge which normally hangs here.
That is why I have added the hanging bells that you won't find in Esther's pattern. which is available from her website. I so love the christmas stocking border fabric I found.
I will have to pick my decorations carefully as Gracie believes everything belongs in her mouth.
The large bowl with candle is usually on our coffee table but not this year as the candle is surrounded with loose berries, holly leaves etc that would soon be destroyed.
Here a few photo's which show my making of 12 DOC
My Baubles, I have never been brave enough to draw the faces on
What else have I been doing. Last blog I was heading out to hopefully buy some more Jinny Beyer fabric's from Grandmother's Gardens' roadshow to Whangarei. I limited myself to buying fat quarters and added another 12 to my collection plus a 1/2 metre of my favourite black eyelash fabric.
I have been reading and re reading the Jinny Beyer book "Colour Confidence for Quilter's" and have been very intrigued by a pattern called " Building Blocks"
Since making Faberge I have been fascinated by the way 3D designs can be brought to life.
There are only 3 templates for this design which on their own would make an eight inch block.
I have made them out of freezer paper so I can cut my strips accurately.
Jinny talked about fragmenting and enlarging a pattern to add shade and colour,
This is simply making 9 patch or 16 patch square and diamond blocks from these templates and shading as desired. so my sewing table now looks like this.
I have gone with 9 patch blocks. Each block needs 5 fabrics that work together so I have the photo for a guide plus my limited selection of Jinny Beyer fabrics which don't give me a complete colour wheel so I am just playing and having huge fun!!!
I should end up with a 24 inch block to frame and use as a table center or if I add a half block to each end it will be a table runner.
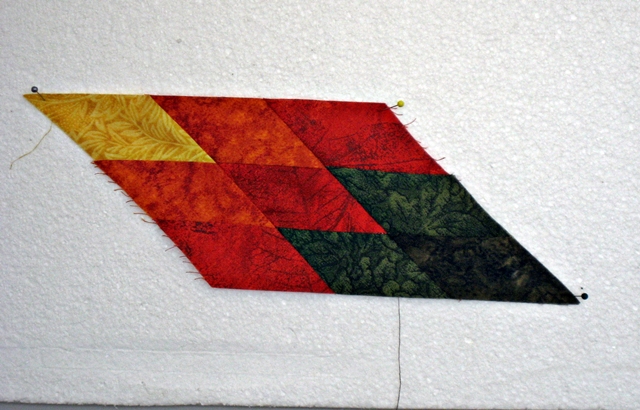
This was my first block and it didn't work as I forgot which block was reversed and which was not, Unpicked and restitched I can use it elsewhere. The red, orange and yellow are fabrics I bought, just because I loved them!!!
I have now made several more blocks and they are pinned to my design board.
You can see how block one would have looked if I had used the correct orientation,
Combining two very different colour pallette's with limited fabric is so much fun.
A week later more blocks have been made and the design is coming together
My incorrect block 1 now has a possible home at bottom right.
Now I am at this stage my colour choices for each block are taking ages. I have 4 blocks to make but what fabrics to use. I know I need another brown/green tone one so that is probably the next and for the square on the left.
As I make the blocks I am thinking more and more about the assembly, no instructions for that and I see so many Y seams in stitching these blocks together - there must be any easy way!!!
Now back to Christmas and decorating the buffet. DH came home yesterday with a ten dollar box of 100 xmas baubles from The Warehouse. NOT what I was thinking of buying but at least a hundred dollars cheaper than the beautiful decorations I had seen in a lovely boutique shop.
Most had a very harsh gold finish or were plain white with no glitter but a few were a softer textured gold. DH simply said the coloured packs were 30 dollars or more so what colour would I like these to be, Red, Silver or Blue? After an hour in the garage he helped me decorate the buffet and my 12 Days of Christmas wall hanging plus put together a centre bowl for the dining table.
Hey!!! I'm happy with these super cheap baubles.
I chose red and silver as the new colours - automotive paint by the way, LOL
Had never thought of adding more decorations to 12 DOC until holding those drop baubles and thinking what would they look like on the outer points of the tree. From there it took off, they are all only placed with pins but for this our first year with Gracie it really is our Christmas tree.
Thank You Esther your pattern has made our Christmas.
This bowl and 3 wick candle we have had since we met 18 years ago. The candle has long lost it's glitter and sparkle and the leaves and berries that surround it are past their best tbut the wonderful vanilla scent is still there year after year, We only light it 3 or 4 times each Christmas so will hopefully have it for many years to come.
The Bamboo tray was a present to us in Raro and this year has let us surround the candle bowl with deco's that won't runaway and are hopefully "Safe from Mouth"
"All Black" cereal bowls - a give away from the local supermarket last week hold the other baubles.
Am not a tinsel fan but it came with the pack, somewhere I have wide white and gold xmas ribbon that may replace it - but where is it ? I have no idea!!!
And the left over's
A never used bowl decorated with gold leaf ( which is why it is never used ) has become the perfect table centerpiece with a wild berries scented candle and more of the repainted baubles.
Again hopefully safe from Gracie's mouth.
I am applying for jobs as they come up but in Whangarei they are few and far between so am not stressing and looking forward to enjoying Christmas with friends and our family in Christchurch then beginning a new journey in 2016.
Enjoy your Wednesday everyone, now linking with Esther's WOW on Wednesday.
Cheer's Jenny