Wednesday, 15 February 2017

Secret Garden Block One redone

Hi Everyone,
Intended to spend the last week working on my oriental quilt but after finishing the first block of Esther's mystery BOM Secret Garden I started have serious second thoughts about it.
My colouring in before I started was soft and delicate but for some reason my flowers ended up bright and bold. The more I thought the more I realised I liked my block but I didn't love it.
This really threw me as my idea of a secret garden is somewhere you can go and just spend time dreaming lovely dreams and recalling wonderful memories, my block did none of that for me.


First thoughts of colours 
Esther had said the finished size of SG was 80" by 80" but I was surprised how big the applique pieces are, guess I was thinking Love Entwined and the hundreds of tiny bits to stitch, I pinned my block up on a diagonal like Esther's sketch page that showed a corner and my block looked so bold. Couldn't get my head around it, maybe because I was also thinking of SG as a wall hanging.
What would be the largest I would like my wall hanging, in our house probably 60" by 60"
Didn't even need the calculator for this one it's 75%  of the original so straight to the printer'
First thing was to remake my flowers and basket


New flowers and basket
This time had my contrast fabric on the wall and used whatever fabric fitted my softer look, Used lots of the same fabrics but chnaged what went with them. the little dark pink floral is still in but it has a Fusions fabric with gold  overlay as it's partner and pink fairy frosts joined in for others


New padded basket
Same Fairy Frost for the basket weave but changed background to a white FF with gold, and used a slightly deeper thread. making my basket changed as hadn't been happy with how the yellow had looked once the basket was stitched. this time I lightly padded the reverse with iron on Vilene 630 and did my stitching before adding my basket to the background, now have a slight puff to all the little squares.
Before LE I used to pad lots of my applique especially flowers so weent back to this method.


Once flower is fused and assembled on baking paper put Vilene with the sticky side down and place flower on top and draw around it.


Cut out roughly just outside the line and then trim a quarter inch inside the line. Position back on the flower and check the fit, in this case it needs a little more trimming  around the top curves so that the edges will stick to the background.


Position on the fabric and carefully press just around the edges then turn over and press from the reverse to fuse the background to the sticky side of the padding, then it's ready to stitch.
A couple of things if you are new to raw edge applique.
Your machine is set from the factory to be ideal for dressmaking with perfectly even tension, you do not want this for applique or you risk your bottom thread popping or your edges puckering because you are not sewing with a straight stitch.
Ideally use Bobbinful, Seralene or any other very fine thread in your bobbin, with my Bernina I feed it through the eye on the bobbin case which tightens the tension slightly.
Prepare a sample, fuse a fabric scrap to a scrap of your background fabric and stitch with your preferred stitch blanket or zig zag. Gradually loosen your top tension until your stitch is sitting perfectly flat with no pulling. My bernina's default toptension is 3.5 but for applique it is just under 2 and even less for some stitches or different threads.
When you look at the back you will think my tension is wrong but you are not dress making and the back won't be seen when you have finished your quilt


Used a beige Serelene for my bobbin and you can see how the top stitch has been pulled to the back showing the different colours used. Can see the burgundy is just a little tight but it is not noticeable from the front. Also tie off all my ends as I don't trust my machines tie off function for applique, last thing you need is stitching that starts to come undone when you have finished your quilt.


Stitched and looking pretty.


Stitched all my flowers first as was undecided what fabric to use for my leaves, lightened my stems and used a zigzag for stitching as they are quite narrow now.


The floral still works really well


Apricot now not Orange

Decided to only use my lighter fabric for the leaves as it has lots of variation and now my leaves are smaller I didn't need to fiddle with two fabics 


Lots of playing for key and bow fabrics. Stitched my circles and satin stiched the little hole before I attached the key, used heavy tearaway behind for these stitches to stabilise the fabric.
tried several different bow fabrics before decided on my contrast fabric. Fussy cut each part of the bow seperately to get the flowers but should have cut the piece over the basket to get more colourat the bottom. Couldn't resist having a butterfy for my center.


Soft and Delicate
This is what I imagined  my block would look like.


Amazing what changinfg just a few shades will do

Very happy to have finished it last night as today is the 15th and Esther will be giving us part 2 of Diamond Hill and I can have fun playing with my brights, on the right quilt this time.

Linking now to Esther's WOW.

Cheers Jenny


Friday, 10 February 2017

Secret Garden First Block

Hi Everyone,

Having lots of hot sticky summer weather at the moment, days continually around 30C but can add on a few extra where we are situated. Sewing room is lovely first thing but by midday starts to feel like a sauna but have still had a fabulous week working on Esther Aliu's new Mystery BOM Secret Garden
Printed out it was much biger than I expected ( had been making LE for so long had start to believe all applique pieces were tiny) so was happily thinking goody this is simple and sailed straight in.
To me the flowers were roses from the start, only the rosebud had thorns so I added some to another stem and was thinking through me favourite  roses from when we had a garden in Christchurch full of David Austin Roses for the colours I would use while making my stems and starting to stitch. About halfway up the first stem - that doesn't look right, what's wrong with my stitches!!
Had set my blanket stitch in reverse size so had  longer stitches very close together, hadn't checked my upper tension and my pressure foot was still at zero from doing free motion, I had raised the feed dogs at least. Was time to get my mind focused and start again.


For the basket I found a fairy frost in a very soft green as Mum used to have sage green and pale yellow vases when I was growing up, or were they jugs and the vases were white, not sure but do remember that the long vases had a metal pad in the bottom similar to a nailbrush but with metal spikes to push the stems into and there was a piece of chicken wire shaped to fit in the top to keep the stems upright. Amazing what comes back to you from a photo.
Cut my strips for the basket and placed them like the pattern but my Virgo mind didn't  like the irregular size of the spaces so cut more strips and did a complete weave using a second strip to set my spacing, ended up needing one slightly narrower strip at the left end, realise now if I had started placing from the left it would have been hidden under the bow,


Added leaves and flower before stitching my vase

Stitching my vase has been like stitching a jigsaw because of the overlaps, kept stitching myself into corners, even though I was travel stitching where ever possible from one space to another. Am about 3/4's done but need to place my bow before finishing. Decided flower needed extra definition so added a petal line and shaded the outer one a little, then decided to change it as felt the orange was too strong.


Like the softer look of it now.

Very happy with my dark rose, haven't changed a thing since I made it. Found a fat quarter of the center fabric at guild day on Sat and just had to have it also an orange version which I used in my bud.


The center flower is like the three bears, at least the middle two petals are.
First they were too light then they were too dark, now hopefully they are just right


Some of my inspiration roses


 David Austin Rose, Buff Beauty gave me the colours for the center flower.


Graham Thomas inspired my yellow flower


My orignal plan was for soft pinks and apricots
Guess this is fairly close.


Tried soft yellow and medium pink before deciding on this fabric for my bow.
Key is two shades of  Fusions fabric.

The circles I stitched before fusing my key to the block, placed a piece of heavy tear away under the key and used stitch 157 on my bernina 440, had practised first to check the number of needle movements to each stitch so I knew when the stitch was going to finish and I could make tiny movements to get an accurate circle. Really pleased with how it came out.

Now to finish my basket and have afew days on other projects before Esther releases month 2 of Diamond Hill,
Have a great week everyone, whatever you are doing.

Cheers Jenny

Wednesday, 1 February 2017

Work on 1st Feb

Hi Everyone,
Wow, January has gone already but I'm glad it's the 1st of Feb as have been waiting in anticipation for the first block of Esther's new mystery BOM Secret Garden. Woke early and thought will it be there, YES had arrived at 3am so there was no going back to bed for me.
Printed a test sheet of the pattern and like Diamond Hill a fraction small, am sure it is our windows 10 causing it as never had a problem until we upgraded. 103% worked perfectly for size so pattern is ready to go. But my fabric, that was another matter.
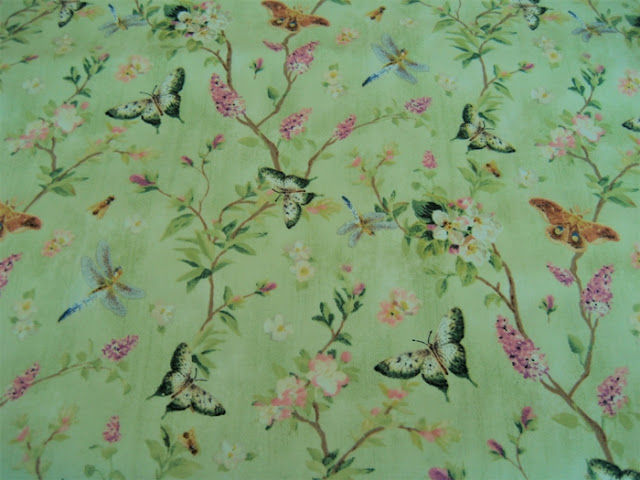
Last week I found a fabric at Country Dawn and knew it was what I wanted for my background.


From Wilmington Prints Subtle Song range
Different from what I would normally choose but love it. 

Once again what I like everybody seems to like, it measured out at only 3.6m left on the bolt.
Came home with it anyway thinking lets wait and see what the pattern says then figure it out as surely there would be borders somewhere so maybe it was enough. I had found a fabric that I really liked for border sas well so it was fingers crossed.
Silently swore when I read the naterials, 6M plus a contrast!! 
Not what I wanted to read but at least I knew what I wanted for my contrast fabric and this is it.


Also from the Subtle Song range
Just how a Secret Garden should look.

Spent ages doing a pile of calculations and finally worked out I would need approx 2m for just the four blocks mentioned plus the unknown size center block so there was an option, find a toning fabric to go with what I have and buy my missing 2.4m and use it for those five blocks and if necessary some other small blocks keeping my 3.6m for the rest of the background.
So I've been shopping again and I hope it works out.


Wilmington Prints again, Hydrangea Radiance range
The darker tone is a perfect match for the other fabric.
Wasn't 6m of that one either so couldn't swop fabrics which had crossed my mind
 as my fabric hadn't been cut from the bolt, it was all there was


Hopeful this combination will work for me.

My UFO's haven't seen the light of day this week, It has all been Diamond Hill and Secret Garden.
Spent some time figuring out how Paint works so was able to play with colouring my version.. 


This is what I come up with.

Will probably be some colour changes for flowers as the blocks evolve but am fairly sure I have enough dark fabric for everything except the little square borders. Have played with them as well as was still feeling unsure if my teal fabric really worked. Decided to applique some little squares to the background fabric and see how they looked.


Better than I thought, especially after I stitched them with a thicker variegated thread. I might just be appliquing not piecing these borders. LE zigzags anyone, thats where the idea came from.

Want to press and then cut my 4 blocks for secret garden so I can make a start tomorrow so linking to Esther's WOW and back to the sewing room.

Cheers Jenny