Have been asked how I stitch my applique, know I have written a tutorial in the past but never label my blogs so now I can't find it. This one will be more detailed with set up for my machine first as this is the most important part for getting a great result.
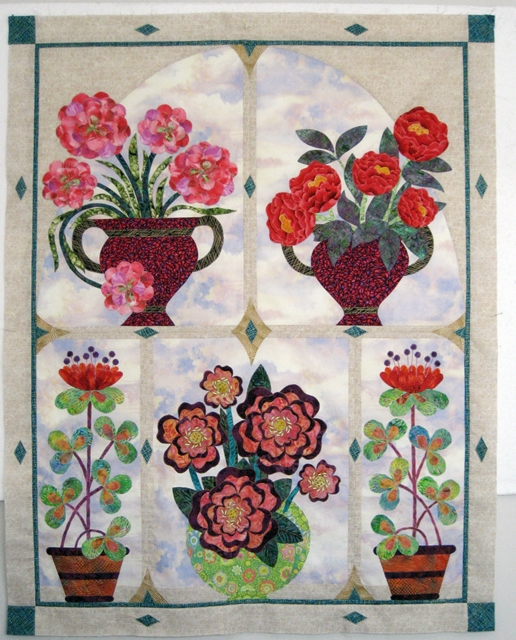
Am showing how I appliqued the leaves and flower of a block from In The Pink, an early pattern by Esther Aliu which I have been making since I finished Secret Garden. Will blog my progress with ITP seperately though.
Here we go.
Probably the most important thing in machine applique is to forget what you know about the perfect settings for stitching. Your machine is set by the manufacturer to stitch with the perfect stitch, if you are stitching seams that is and every one knows that fabric or thread choice can mean you need to make slight adjustments. For applique these adjustments are much bigger.

On the left is my machines default setting for tension, have to say I normally set it at 3 for straight stitching as it seems to stitch better for me.
On the right for applique I reduce my top tension to 1 and then stitch a sample with my chosen thread and fabrics to make any fine adjustment, metallic thread may need to be a little less than 1 depending on fabric.
You can see at the bottom of these photo's a sliding control, this is stitching speed and you can see it is set just under the center. I will not be stitching fast and this setting stops an accidental press of the foot that will send me racing away - and unpicking.

My usual stitch is a single blanket/buttonhole stitch although machine has two others that I use on occasion but this is the one I use most.
On the left default setting and the right my setting. It is length that I reduce most as doing raw edge it seems to almost seal the edges as I stitch.
For smaller pieces and narrow points or areas my width could reduce down to 1.4
Stitch adjusts in .2 increments at the push of a button so easy to do while stitching.
Have also set the needle to the down position, vital for all the stopping and turning of fabric.

The threads I am stitching my block with are Maderia Polyneon and a Mettler Polysheen variegate.
They are synthetic threads so care needs to be taken to press from the back of the work when stitching with these as too hot an iron can melt them.
On the right is my normal bobbin thread, Seralene which is similar to Bobbinfill, Decobob or other lightweight specialist bobbin threads.
My Bernina machine has an eye on the hook of the bobbin case which I use when threading the bobbin as it tightens the bottom tension slightly with out having to alter the actual bobbin tension.
I only have two shades of bobbin thread for applique, beige for light backgrounds and black for very dark ones but have a Decobob bobbin set of colours that will use if am concerned about a particular area
Needle is an 80-12 Cordenet or topstitch needle, the sharp point and slightly larger eye I find ideal for the majority of threads I use including metallic

As most of my threads are on small cones and my machines main holder for thread is horizontal I prefer to feed my thread from a stand. Also gives a better feed with specialty threads. A tip given to me that I use is to tape a safety pin to end of machine and use that as the first feed from the stand as in photo on right.
The last thing I alter before I start stitching is the pressure on my foot. can't take a photo as the numbers don't stay on screen long enough but machine has recommended pressure of 47. Once again I am not straight stitching so I reduce pressure to between 25 and 30.
This means I can move the fabric under the foot while stitching gentle curves.
Have checked my settings are right by stitching a test of same fabrics and thread plus my stabiliser.
If you haven't done much machine applique I would suggest you start by just stitching for a while and feeling and understanding how your machine stitches ie left, right, forward and repeat or maybe its left, right, forward, back, forward then left, right again, it all depends on your machine.
Get into the rhythm and count it in your head so you can predict where the needle will stop and go next. You really need to know this for when you turn your fabric or to pivot at a corner or point. Thanks Terry, I know my stitch so well had forgotten to mention the importance of this.

Although my stitching would look good without stabiliser, (used it hardly at all for Love Entwined )
I now use it all the time for stitching my outside edges. This one which I love using is a heavy tearaway which looks and feels like blotting paper, it is made from recycled cotton.
I'm stitching the flower at the top of photo so have cut a piece the size I need.
Time to start stitching

Nearly forgot, am using an open toed embroidery foot which gives clear vision of the stitching area.
I prefer to tie off all my stitching on the reverse so make sure I have both threads long enough for tying and secure the top one with my fingers as I set the needle for my first stitch. Botom thread is laying flat and out behind the needle.
Needle is positioned JUST off the edge of the fabric, you do not want to catch the fabric edge as this can cause fraying, too far away from the edge also creates problems as background may pucker or fabric can fray because you have only caught one or two threads.
I have picked a place to start where because I am stitching stem and leaves in one colour I won't have to stop and restart my stitching. I use a small straight stitch to travel either under or on my stitching.

My skills in paint are terrible but the black line is where I will stitch, the two red lines on the swirl at top of photo are where I will straight stitch in, turn and stitch around the swirl, then straight stitch back out to carry on up the stem.

Stitch slowly and maintain the needle entering your background just off your applique.
Where the base of the flower is I will again use a small straight stitch to move to the other edge, stitching right next to the flower but not on it. those stitches will covered when stitching the flower.
For the swirls there is a lot of stopping and turning of fabric. Not that much going around the outside as the lighter pressure on the foot will let me slowly stitch most of the outside curve with out stopping. Coming out though it will be stop and move fabric every stitch for the tighest part.
then plain sailing to the point of the leaf.

Here I have reached the very point and have turned my fabric so that I can take one stitch inwards right on the point. Machine has a pattern start button so that I only do the in and back stitch then turn my fabric for the forward stitch down the next side. With knowing my stitch well I can stop and place my needle precisely for the point if necessary or adjust a couple of stitches coming to the point, this is where the rhythm comes in.

Ready to stitch down the side, shows where I will stitch past my starting point and finish where I made my first turn to go from the stem around the leaf. Will show point better on the flower.

Stitching finished and on the reverse the top thread is clearly being pulled through by the bobbin thread. Hands up in horror if this was a seam but for applique this is what you want on the back of your work.

Positioning for the start, though thinking about it, it can be easier to start on the straight rather than right on the point as I have here.

Approaching the point this is where I start reducing my stitch, 1.6for next few stitches then to 1.4
Note that my applique edge where I will stitch is always at 90 degrees to my needle, use the inside right edge of the foot as your guide and stop and turn fabric a fraction every stitch of necessary to keep that edge at 90 degrees, moving the fabric at the start of your forward stitch.

My forward stitch has taken me right to the point so have turned fabric so that point is at 90 degrees to my foot to make 1 horizontal stitch in and back to the same point.

Next stitch is forward and am stitching away from the point, two stitches at 1.4, two at 1.6 then back to 1.8. the rest of the curve I can gently move my fabric as I stitch.


You can see the top threads clearly on the reverse. The cut in my stabiliser is because when I started stitching the flower my fabric was not sitting perfectly on my stabiliser and a quick snip let me correct it.
For the center I wanted to do some additional stitching and decided I could do it as at the same time as stitching the edge.

Used an air dissappearing pen to draw my stitching lines on the center.

Stitched the first side reducing my stitch to 1.6 at the start of the neck and kept that size to the point.
Turned my work to start the additional stitching and stitched with a small straight stitch in to the start of my marking the changed to triple stitch for a defined stitch and stitched on my drawn lines, stitched back out to the point and then completed the second side.


That is my flower finished and once the other panel is stitched it will look like this completed block

Hope this helps you understand my way of stitching and how I set my machine.
Suggest you make up some samples, have a pad and pencil alongside and play with your machine noting your settings and record what works for you.
Enjoy your applique everyone.
Cheers Jenny

Positioning for the start, though thinking about it, it can be easier to start on the straight rather than right on the point as I have here.

Approaching the point this is where I start reducing my stitch, 1.6for next few stitches then to 1.4
Note that my applique edge where I will stitch is always at 90 degrees to my needle, use the inside right edge of the foot as your guide and stop and turn fabric a fraction every stitch of necessary to keep that edge at 90 degrees, moving the fabric at the start of your forward stitch.

My forward stitch has taken me right to the point so have turned fabric so that point is at 90 degrees to my foot to make 1 horizontal stitch in and back to the same point.

Next stitch is forward and am stitching away from the point, two stitches at 1.4, two at 1.6 then back to 1.8. the rest of the curve I can gently move my fabric as I stitch.


You can see the top threads clearly on the reverse. The cut in my stabiliser is because when I started stitching the flower my fabric was not sitting perfectly on my stabiliser and a quick snip let me correct it.
For the center I wanted to do some additional stitching and decided I could do it as at the same time as stitching the edge.


Stitched the first side reducing my stitch to 1.6 at the start of the neck and kept that size to the point.
Turned my work to start the additional stitching and stitched with a small straight stitch in to the start of my marking the changed to triple stitch for a defined stitch and stitched on my drawn lines, stitched back out to the point and then completed the second side.


Hope this helps you understand my way of stitching and how I set my machine.
Suggest you make up some samples, have a pad and pencil alongside and play with your machine noting your settings and record what works for you.
Enjoy your applique everyone.
Cheers Jenny