Friday, 30 January 2015

WOW Thursday 29th Jan

Hi Everyone,
Has been a quiet week for me sewing wise as DH wanted to make progress with our renovations.
Up until Saturday I could sew but that night was told pack up your machine, your sewing room is moving tomorrow while you are at work.
When I got home I was just in time to help as Steve had finished taking my table apart and it was ready to move. My table is purpose built, 3 student desk tops, an old kitchen cupboard and an old overhead china cupboard with sliding glass doors to my fat quarter collection, at the moment all suffering from sanding dust!!! But it is in place.
My DH is very clever though. At the moment there is NO power to this room!!!
This means I can clean up and help him with progress around the house before disappearing into my sewing room. There is such a thing as an extension cord but I will forget about that for the time being!!!


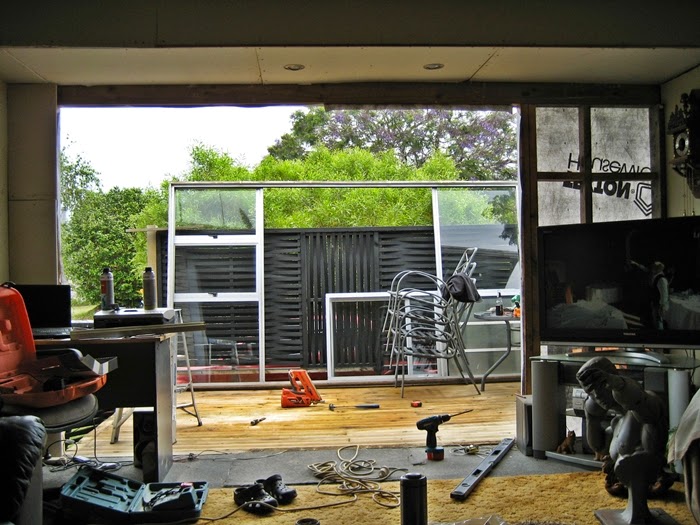
You can sort of see the configuration here.
Glass cupboard is under the long side and ALL is dusty!!


New cutting bench in front of the window, quilts and fabric with no current home, 
covered until I can get to them


What is left of my old sewing room
Cutting bench plus Scotch Chest with no home from our bedroom.
New wall being built across the room for our office and the good bit for me,
all that space on the left side is becoming storage cupboards.Yeah!!!


Start of our office or 4th bedroom.
Disappointed to find we can't fit a single bed as well with the size of our computer desk/chair
but plenty of room for a bookcase or two. 
Most of our books have been stacked under my sewing table for the last few years, leaving just enough room for my foot control. Lol.
The early shift into the computer room was because of this chair.


This is where our computer desk used to sit, in our YES also unfinished lounge.
Can't wait for our new carpet to get rid of the temporary fix for our extension.
The store next to my work is a baby store and this is one of their breast feeding chair's.!!!!
Returned by a customer as faulty, they had not followed the assembly instructions correctly 
I sat in one a few years ago and fell in love with it, far too late for me to need one but they are so comfortable. It swivels, rocks, reclines and it's foot stool adjusts to your position and rocks as well.
Repaired and for sale at under half price.
Rang Steve and asked him to come in and see what he thought of it - he looked and then he sat in it.!!!
Result - if you want it, buy it!!
Got home, the computer desk was moved out of the lounge and guess who is sitting in the chair most night's.
The baby store told me, if we get the husband in the chair - it's sold, worked for me!!!

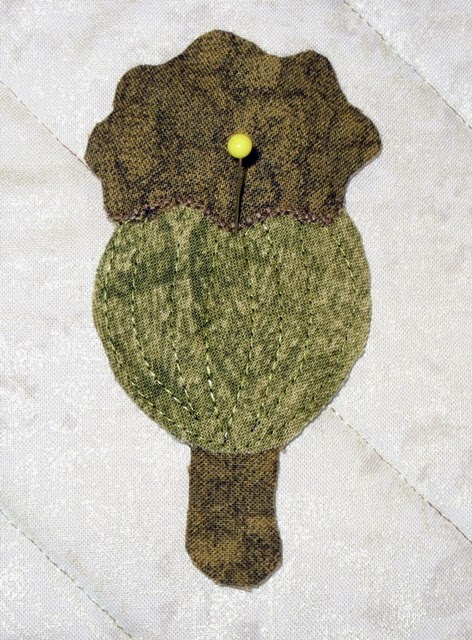
To what quilting I did get done before having to unplug my machine. Am nearly half way with my baubles as have finished five plus the applique on the sixth. As I can't handstitch very well any longer I changed from Esther's pattern method of handstitching aound the padded bauble and will photograph my technique for my next blog post but here are my next 5 baubles. you can also see my background fabric's better in these photo's


Two Turtle Doves
We have very similar wild doves in Northland NZ but under a different name.


3 French Hens
This was fun but was several attempts to get fabric choices I was happy with.


4 Calling Birds, Esther's blog archive let me understand this one.


Five golden rings. Would love to do an embroidered spiderweb wheel top but I tried one for my poppies and it didn't look good and I had to take it off.
My Thumbs do not like handwork.


Six geese a laying. Not finished yet as this is when I had to pack up my machine.
Will show you how I am finishing my baubles with this one on my next blog.

Final Photo, six baubles on part of my tree background.


Now to link to Esther's Wow and then start organising my sewing room,
Enjoy your week everyone, Cheer's Jenny


Tuesday, 20 January 2015

Quilting with a House under Renovation.

Hi Everyone, This should be a WOW link to Esther, if I finish in time it will be but it is already Friday in NZ and time is running out. This was last week, I ran out of time !!!!
The last week has been DH doing the major renovation work as he has to start back at his other build next week and our place will take second place once again.
DH tells me I should be in my new sewing room by the end of next week. There will be no carpet on the floor but I need to move out of my now very dusty and cramped sewing room for his work to continue over the next week or so.


Window in and looking out. New sewing room faces NE so by early morning sun is streaming in and in summer it is going to be hot, have already mentioned I will need an awning for next summer.


My Current sewing room.
A new window added as this room will become our office, a passage to the new room and a 3m storage cupboard on the other wall.. Doorway in place to new room
Quilts with no where to live at present sit on my sewing table and I have to work around them


Looking back from the new room you can see what I have to work in at present
DH does cover everything while I am at work, thank goodness!!!
Around the house work continues as well.

Our new ensuite is finally gibbed and the window has been changed to double glazed etched glass.

From the exterior. Made to fit our brick cladding 

All bricks removed from the new spare room / ensuite front wall.


New spare room window and cladding in place.

From inside, this smaller room in now light and airy, private with the bottlebrush and tree in front
but full of more excess everything that we need to find a home for!!!!


Cladding also across the front with our smaller ranchslider which was the first to be in stalled
You can see the size of the trunk of the bottlebrush and how big a tree it would be if it had not been cut back many years ago. it is not the prettiest from the road, but it's new growth is perfect for privacy so I keep saying it stays. 

And finally to my sewing. Before work started on the house I managed to stitch the last poppies on to the background. They do pop off the fabric once they are stitched down.


This photo I still had the right side petals to stitch.
Because they are padded I stitch with them only pinned into place.
I could add bonding web to the back of my padding but I like the extra "puff" I get by not using it.


Now pinned over the current wallhanging in our lounge, one of the least dusty rooms!!!
 I need another couple of leaves on the right hand stems but this along with the final trimming and a
2 inch dark border have to wait until my sewing room is moved and I have space again.

In the meantime I have started Esther's 12 Days of Christmas wallhanging, I can just manage it on the space I have left on my sewing table. Have made six of the 12 foundation pieced blocks for the tree so far.

The true colour is deeper greens but it did not photograph well.
Still not sure the fabric with writing was the best choice but the more blocks I make the better it works,
it was also the only fabric I could find to make the other's work together.

This morning I made the first of the baubles - A Partridge in a pear tree


These baubles celebrating the song are going to be so much fun to make.
I  padded the bauble before doing my applique stitching as for me this gives a more 3D effect.

If you would like make this wall hanging the pattern is available for purchase from Esther's on line shop and she has all her blog posts about it on her blog site. They are great to read along with all the comments of those that made it along with her. 
I am no good at adding links so just go to the post links at the top of Esther's blog. 

I am either making another bauble now or adding the backing to this one.
Cheers's Jenny


Wednesday, 7 January 2015

Welcome 2015


Hi Everyone and Happy New Year to you all.
I hope you have all had a wonderful festive season with your family and friends.
As usual I worked over Christmas, with no children it seems only right to allow those that have children and grandchildren extra time to share with their dearest ones.
In the the days preceding and following Christmas I spent much time on the phone with my family and friends in Christchurch, catching up and sharing our news.
Xmas day we spent with friends, after my DH had spent the morning concreting the piles in for our new spare room- or more truthfully - my bigger sewing room!!!
Over the last week our room has taken shape.


Clad with building wrap you can still  just see my sewing room window.
Luckily our cycad garden doesn't have to be touched, when the room is finished this garden is already mature.


Looking into my sewing room from outside, bricks stripped and a window soon for removal.
New Years day I finished work at 2pm so we were able to clad the front of the room.
Steve needed someone to position the other end of our rustic timber boards while he nailed them up.


With a helping hand from our neighbours the new window is now in place, a few New Year's beers afterwards sealed the deal for the rest of the windows as well.
Double glazed, these windows are far beyond my strength to either move or lift.
For those of you who don't know, rusticated weatherboard is a cement board designed to look like timber, very popular in the 1980's 90's but not  popular today. Our house was built late 60's so we feel using this product is in keeping with the era and my DH doesn't have to become a blocklayer as well!!!
We have used it around the ranchslider at the front of the house and it will go across the rest of the front so we will end up being 50/50 bricks and weather board.
Today, which is a beautiful summer's day, Steve is cutting into the existing roof and completing the roofing.
The existing house has a hip roof but doing the extension as a gable is quicker and easier. It can't be seen from the front and as we put a gable roof on our new garage  the back area matches.

I did ask DH  for a very special present for Xmas, and I got it.
Esther's pattern for 12 Days of Christmas. I joined Esther's yahoo BOM group after this pattern was released but have always loved it - but I only remember it at Xmas - always too late to make it for the current year. Now I have a whole year to find the perfect fabric's and make it for next Xmas.
If you want to make it, it is available for purchase from Esther's Web Store.

This is a larger version of Esther's pattern that Glenda in Australia made.
More presents plus Candles. It is truly beautiful, 
Thank you for sharing this photo on your blog Glenda, I have saved it as my inspiration

Although my sewing room is very dark at present, thanks to the new room covering it's window, with the aid of electric light I have been able to continue working on the leaves for my Poppies wall hanging.


Pinned on the lounge wall with the flowers also only pinned in place .
My stems are straight, the bottom of the hanging is draping over the couch.
Not too many more leaves to add now but they have been a major for me
and progress has been slow.
Adrienne's pattern only had 5 stems and I have 8 in a very different placement.
Mirror imaging them, plus a mix and match approach is getting me there.

I meant to post this blog last week but ran out of time to link it to Esther's WOW so it has been sitting waiting for this week.
Cheer's everyone, Jenny


Thursday, 18 December 2014

WOW Dec 18th

Hi Everyone, thankyou for visiting my blog.

Summer finally arrived in Whangarei, temperatures climbed to the high 20's Celcius and humidity is 90% +  not anywhere like it was in Rarotonga but we have adjusted and feel the heat anyway. Lovely to work in air conditioning and have customers say " it's so nice in here, I don't want to leave"
However this week we have been back to heavy rain, thunderstorms and very humid. Not what December a week from Christmas shoud be.
A couple of weeks ago we decided to buy me another run around for going to work as after my foot issue proving to be only trauma to my foot from using the clutch pedal with wrong seat position in a manual drive car I dodn't want it happening again as it has taken 6 weeks to come right.
A 1998 Volkswagon Golf has joined our fleet - now giving us 5 vehicles for 2 people. Something will have to go in the new year!!!


I love it, although the drive home from Auckland left me thinking we had bought a dog. We bought it off Trade Me, the NZ version of Ebay and it was as is where is. It did have a new WOF and Rgistration so couln't be too bad - could it!!!
It coughed, it spluttered, it lurched through it's low gears and had so little go I worried I would not get up the Bryndewen's, a hill range south of Whangarei.
Luckily Steve stopped in Wellsford, last town before the Bryndewen's and asked why I couldn't keep up with him - he drove it  from there - but - I still couldn't keep up with him once we changed cars - maybe it was only me!!!
Next day he gave it a full service and now it runs like a piece of clockwork - it is all it needed.

Have worked all week but have found time to complete all the poppies for my wall hanging.


Adrienne's poppy, stitched and padded, ready to place on my background


This poppy is from Esther Aliu's "Forget Me Not"  wall hanging BOM.
I have increased the pattern size so it is similar to Adrienne's poppies and reduced a few of the curves so it looks more of a match in style.
With 16 applique pieces this was the most complicated of the flowers to put together.
The second of Esther's Poppies.


I added an extra petal and a base behind so it is more similar in style to the other poppies.


Seed pod from Esther's BOM, has not photographed well, the green is the same as the bud below.

I have already edge stitched the center of the bud as I don't want to stitch this once the bud is in place as it will flatten the bud too much. Will be doing this to several of the petals on the poppies as well before they go into place.
Now I can play with them on my background.


This photo will be my guide for finally placing my flowers as am close to happy with placement and they have to come off while I complete the background stitching.
I am getting there. There are stems and lots of leaves to make which will fill the dark area's at the bottom of the wall hanging. I know that an uneven number of flowers is better with applique but my even number seems to be working.

Our new double glazed windows and ranchslider arrived last Thursday after DH had rearranged the garage to make room to store them. Saturday with the forecast for days of rain it was time for the new ranchslider to go in.
Old one out

 Time to build a new wall. 
New slider is smaller as we had found we had to keep the drape drawn behind the tv to be able to watch it. so  full width was not really practical.


Even more interior work to complete now.

I now have a couple of days off so once I link to Eather'sWOW it will be back to my poppies.
Enjoy what ever you are doing,
Thanks for dropping by
Cheer's Jenny


Thursday, 4 December 2014

December Already

Hi Everyone,

Thinking if I am quick I can link my blog to Esther's WOW this week.
Have found my next quilting project, another wall hanging for our renovated house.
Well, hopefully will be renovated house. My DH has promised me he is taking January off and concentrating on finishing our many started but not completed projects - yes, he is a builder which explains everything, Lol.
But, I think it may take longer than 4 weeks so my fingers are crossed, especially as we got an email last night to say our new doubleglazed windows are ready for delivery - and we are no way ready for them!!!
Anyway, with my Faberge hanging for one wall finished I started thinking about another lounge wall.
I had made an inpulse purchase at The Warehouse of this lovely decor arrangement which fitted vases given to us as a wedding present 14 years ago perfectly.


The colours worked so well with the new wall hanging  that I realised deep reds would be the perfect foil on another wall and the only wall hanging I have ever sold came to mind.
Adrienne Walker's Papaver Pizzazz. or "Poppies"
I first  made this wall hanging about 5 years ago and it is the only one I have ever sold as my neighbour fell in love with it and wouldn't let me just give it to her as I wanted to.


The only photo I have of it. I was in a very metallic stage then and all my backgrounds had to shimmer and shine. It is still  the header on my blog although half the header has disappeared and I don't know how to get it back!!!
Thinking of the colours of our new lounge walls this is my background for my new wallhanging.
A deep black/blue that links to my faberge wallhanging. Fairy frost cream that gives me a wonderful shimmer and dark mottled red/black for the contrast
This wallhanging will go behind a 3 seater couch so I have added an extra panel at the left end and shrunk the depth, more Poppie's will be needed but I can mirror image or I am thinking of including some from Esther Aliu's Poppie's from her "Forget Me Not" BOM I have already enlarged her pattern as I think they will work very well.
Today I went and bought my 5 shades of red for the poppies.


They haven't photographed true as the dark areas are really wine reds not just dark as they show here.
The fabric on the right will be the predominate colour. 
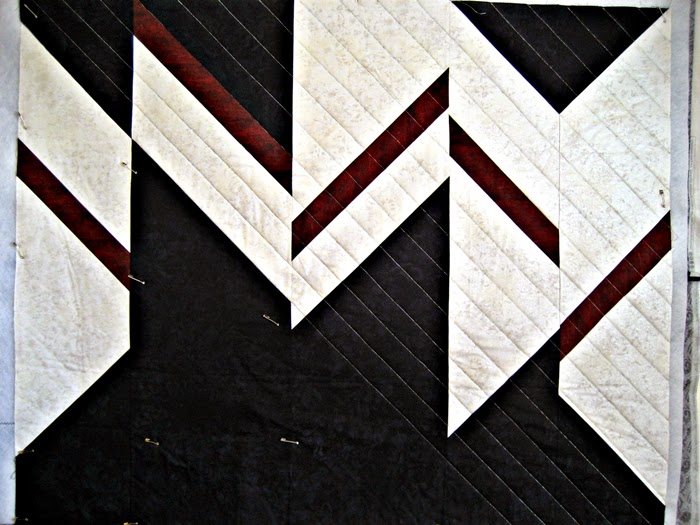
Adrienne Walker designs are interesting, before I add my applique I have to bat, back and quilt my background fabric, in this case just simple diagonal lines stitched across the background fabric which gives a wonderful result. Being a wall hanging I have used Vliesline H640 iron on as my batting.
I used the deep red diagonal as my width so not to have a quilting line on it, but have had to adjust my widths to keep the matching diagonals also free of stitching. 


Half stitched and ran out of thread. A couple of days worrying can I still buy it as it is a gold/silver/bronze mettalic that I bought several years ago. Yay, Mettler still make it and my local shop had it in stock.
In the mean time I started on my first Poppy.


It's a while since I used this technique which I learnt at a Mary Transom course.
I felt like a beginner again but after reaching this point it all came back.
I traced my pattern onto fusible web, cut out and put my poppy together on baking paper. 
I fused it to a lightweight vilene so that I could machine embroider my vein lines and stitch any edges I want to keep raised once stitched to my background. I had to unpick all the veins on my light petal and restitch them as the thread I used on the deeper petals was just to dark for the bright petal.
The next stage was to trim and then pad my flower.


My first poppy is now ready to be appliqued to my background.


Linking now to Esther's WOW.
Enjoy your quilting or your Wednesday, whatever you are doing,
Jenny